To deploy a model that is stored in mlflow, we have to
In [1]:
import pandas as pd
from sklearn.feature_extraction import DictVectorizer
from sklearn.metrics import f1_score

from sklearn.tree import DecisionTreeClassifier

from sklearn.pipeline import make_pipeline

import mlflow
In [14]:
def load_data(train_path:str, test_path:str):
    train = pd.read_csv(train_path, sep=";")
    test = pd.read_csv(test_path, sep=";")

    return train, test


def preprocess_data(train_data, test_data):


    trainX = train_data.drop(columns=["y"])
    trainy = train_data["y"]

    testX = test_data.drop(columns=["y"])
    testy = test_data["y"]

    trainy = trainy.replace({"no":0, "yes": 1})
    testy = testy.replace({"no":0, "yes": 1})

    trainX = trainX.to_dict(orient="records")
    testX = testX.to_dict(orient="records")

    return trainX, trainy, testX, testy


def model_pipeline(trainX, trainy, testX, model_params:dict=None):

    pipeline = make_pipeline(
        DictVectorizer(),
       DecisionTreeClassifier(**model_params)
    )

    pipeline.fit(trainX, trainy)

    pred = pipeline.predict(testX)

    return pipeline, pred


def evaluate(testy, pred):

    return (f1_score(testy, pred))
In [13]:
params = dict(max_depth=None, max_features=8, random_state=12, max_leaf_nodes=12)

train, test = load_data("train.csv", "test.csv")

trainX, trainy, testX, testy = preprocess_data(train, test)

pipeline, pred = model_pipeline(trainX, trainy, testX, params)

print(evaluate(testy, pred))
Let's assume we have this very horrible model we want to log and deploy.
In [16]:
mlflow.set_tracking_uri("sqlite:///mlflow.db")
mlflow.set_experiment("term-deposit-exp")
Out[16]:
In [17]:
with mlflow.start_run():

    mlflow.set_tag("developer", "Sharon")

    mlflow.log_param("train-data", "train.csv")
    mlflow.log_param("test-data", "test.csv")

    params = dict(max_depth=None, max_features=8, random_state=12, max_leaf_nodes=12)

    train, test = load_data("train.csv", "test.csv")

    trainX, trainy, testX, testy = preprocess_data(train, test)

    pipeline, pred = model_pipeline(trainX, trainy, testX, params)

    score = evaluate(testy, pred)

    print(score)

    mlflow.log_metric("f1_score", score)

    # log the model directly using .sklearn
    mlflow.sklearn.log_model(pipeline, artifact_path="dtc-pipeline")
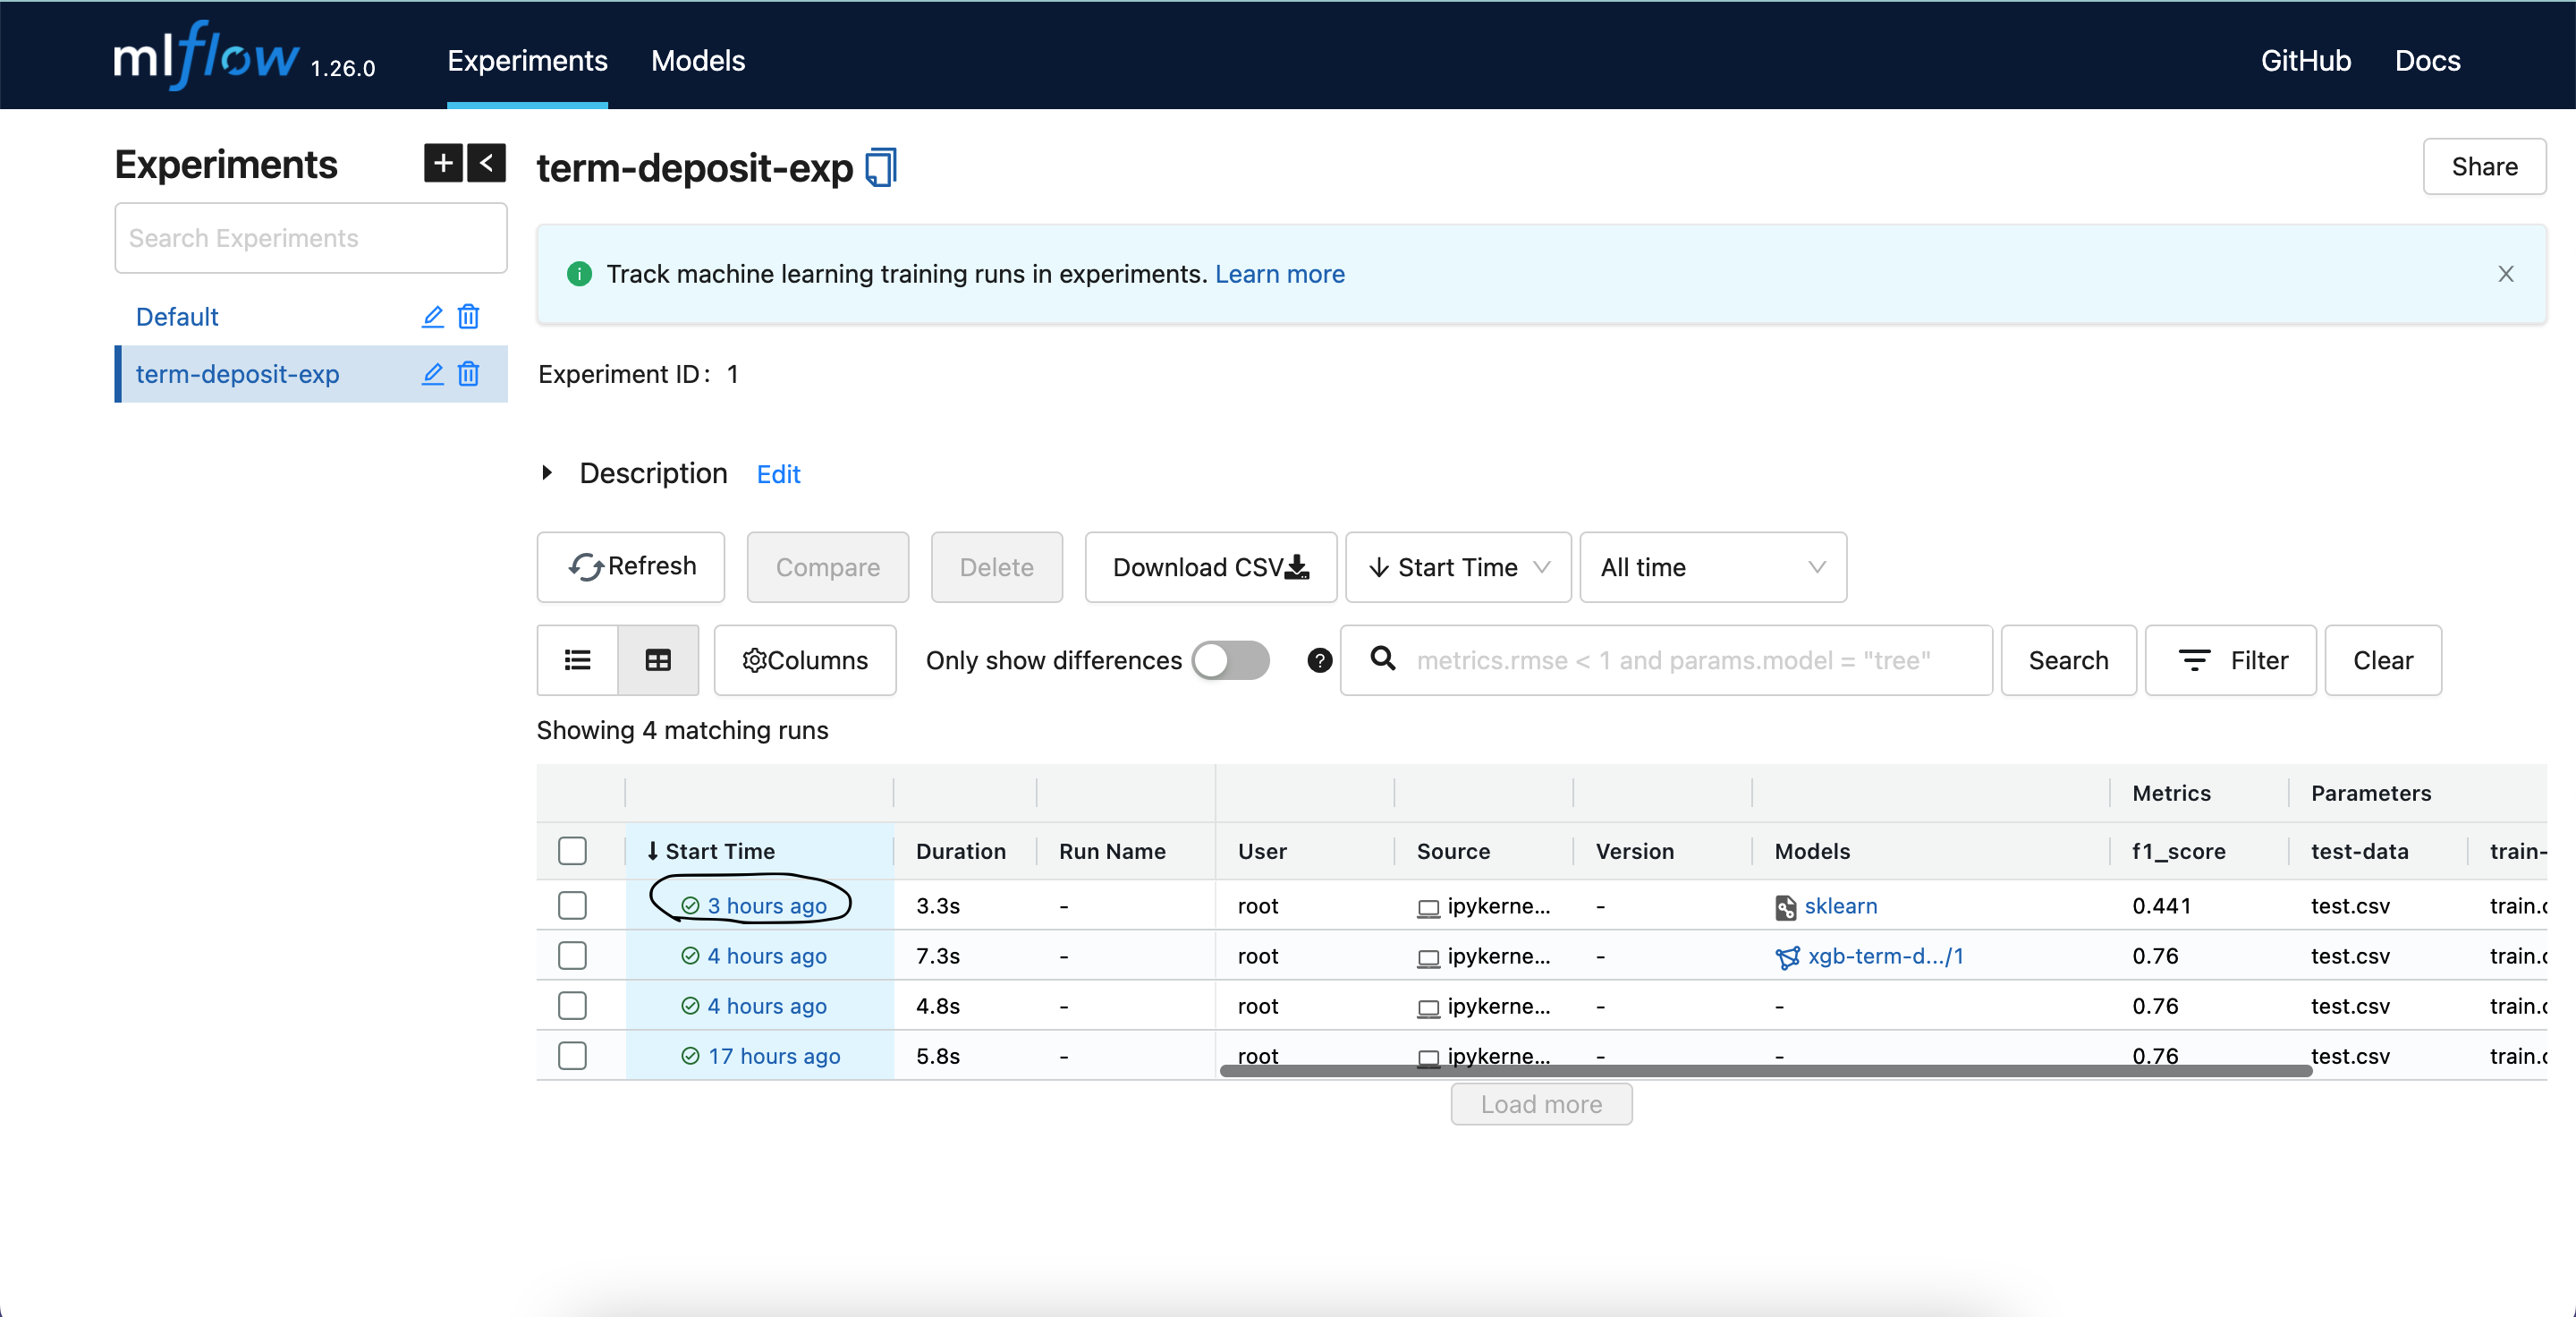
To view any experiment, click on the time under the "Start Time" column depending on the experiment of your interest.

Deployment.
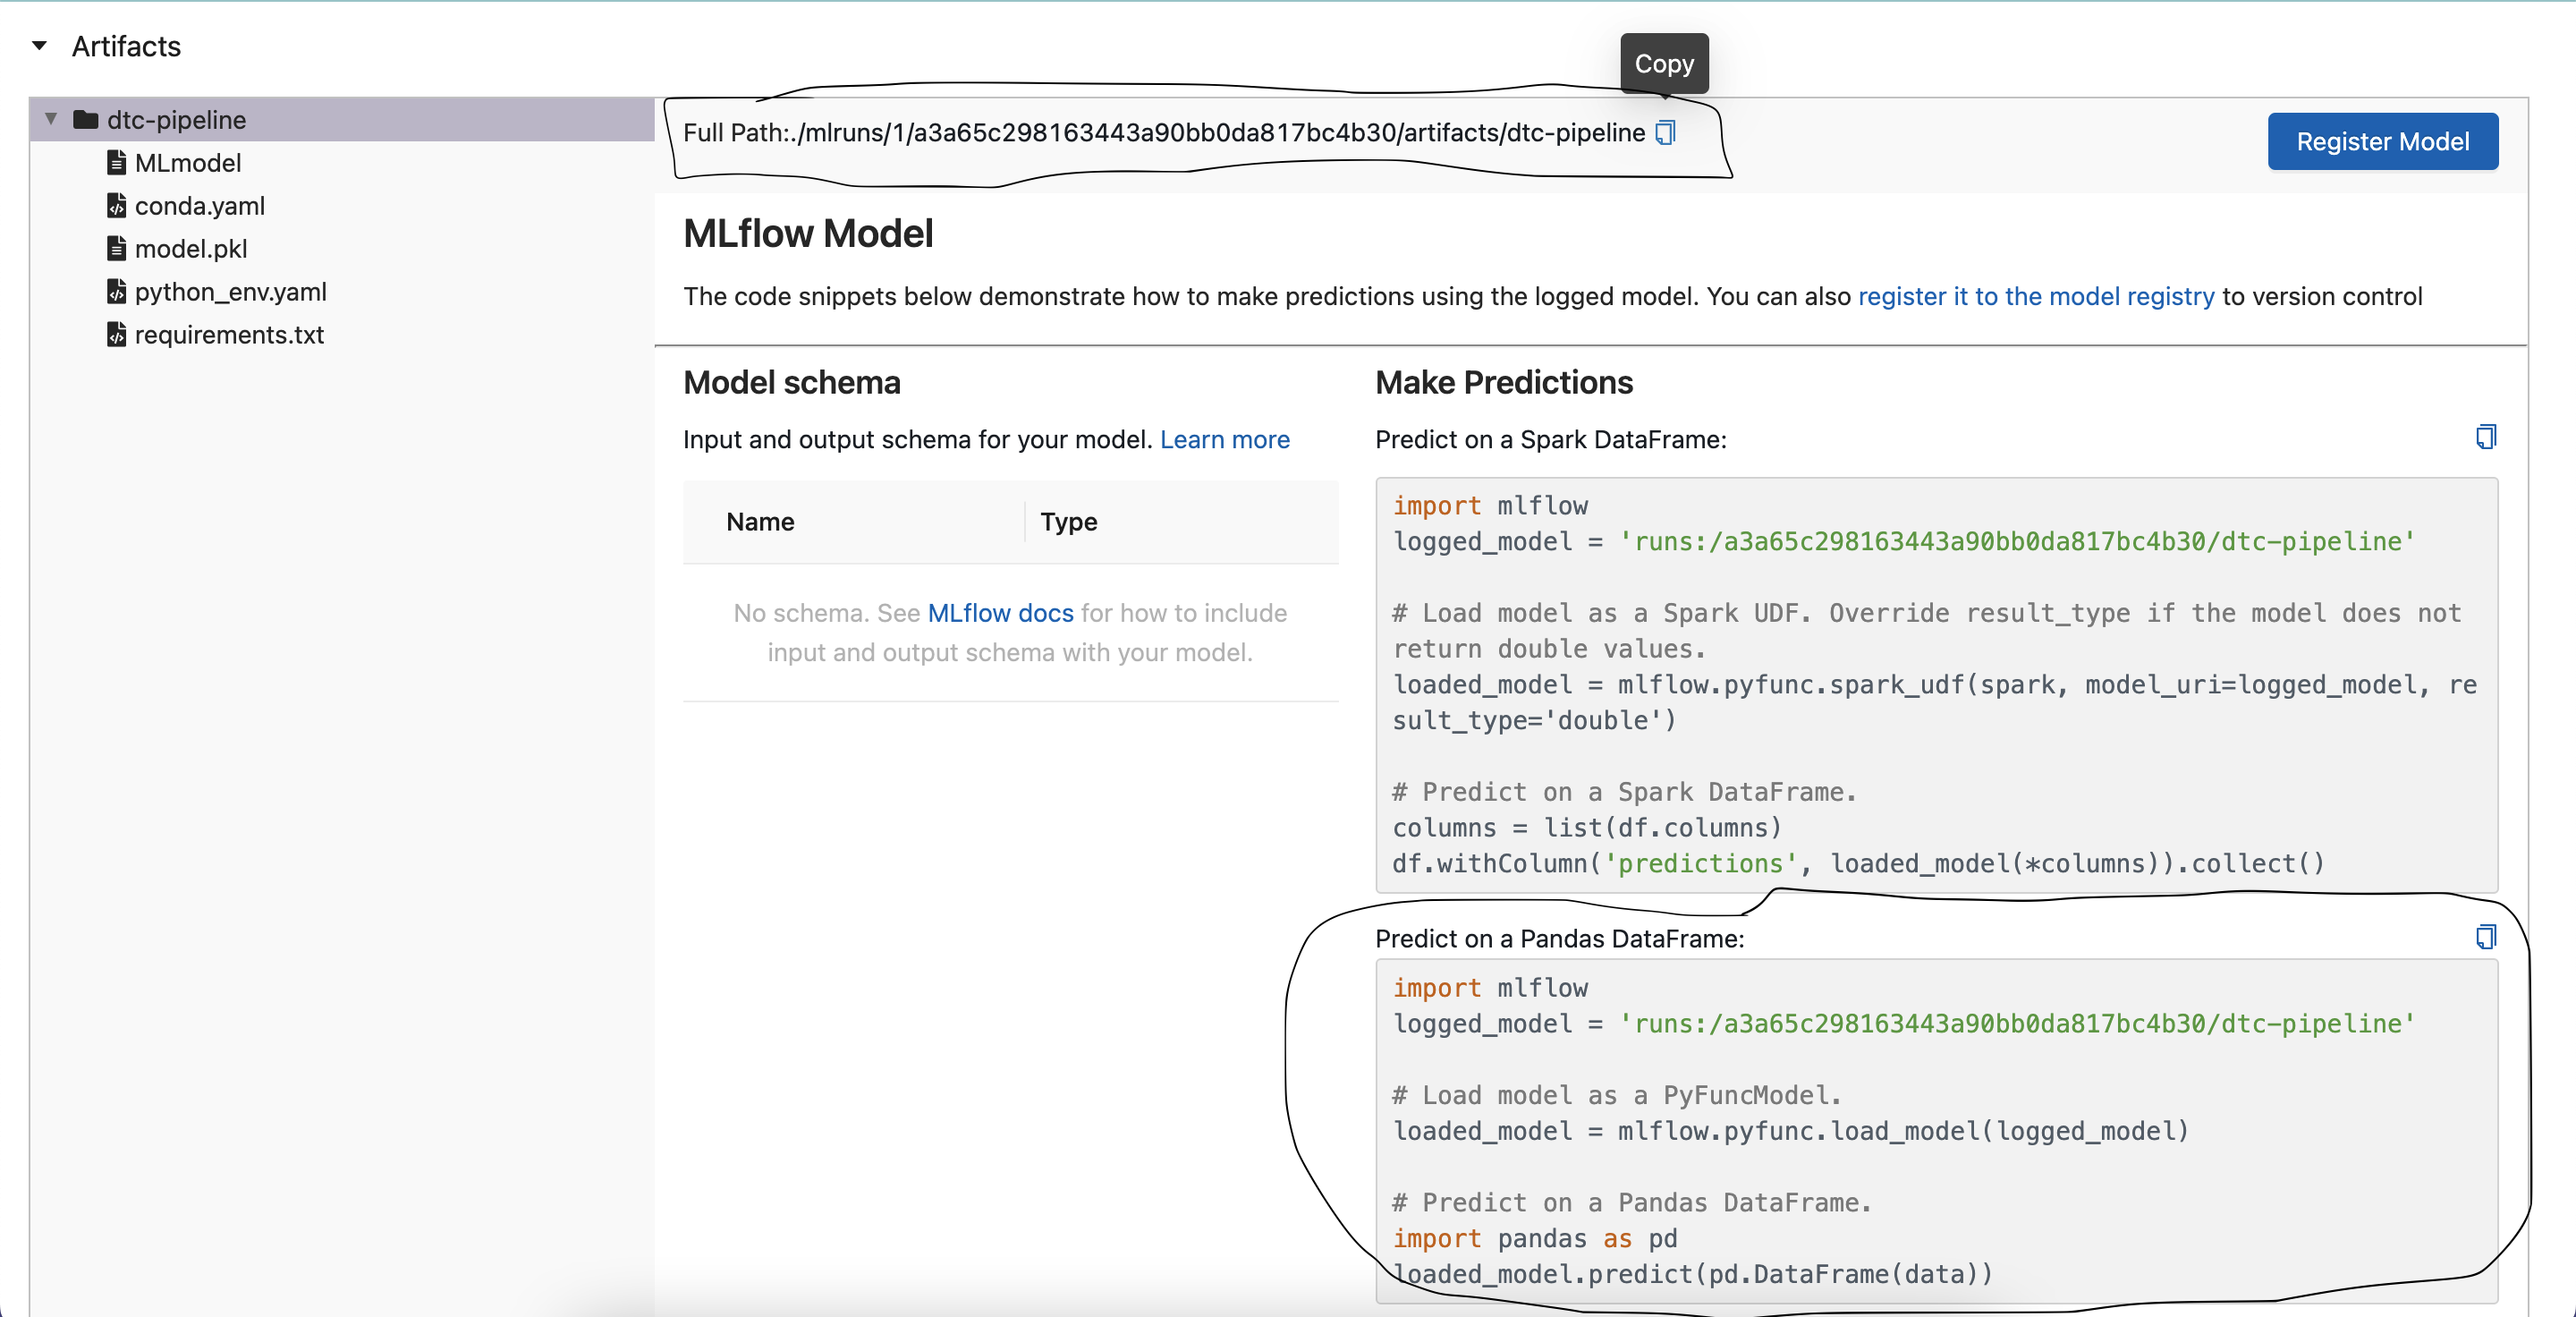
- Call the model from mlflow: After opening the experiment of your choice, scroll down a bit to "Artifacts". You should have something similiar to the image below.
Copy the full path:
./mlruns/1/a3a65c298163443a90bb0da817bc4b30/artifacts/dtc-pipeline

- Head over to VSCode and write some flask codes
In [ ]:
# Open your code editor, like VSCode.
# In your terminal, active your environment, where you had earlier installed `mlflow`
# Install Flask and pandas in your environment
# Paste the code below, into your code editor.
1  import pandas as pd
2
3  import mlflow
4  from flask import Flask, request
5
6
7  RUN_ID = "a3a65c298163443a90bb0da817bc4b30"
8
9  model = f'./mlruns/1/{RUN_ID}/artifacts/dtc-pipeline'
10
11 #Load model as a PyFuncModel.
12 model = mlflow.pyfunc.load_model(model)
13
14
15 app = Flask("term-deposit")

@app.route("/predict", methods=["POST"])
def predict():

    data = request.get_json()

    pred = model.predict(data)

    result = {
        "result":int(pred)
    }

    return result

if __name__=="__main__":
    app.run(debug=True, host="0.0.0.0", port="8000")
EXPLANATION
- Replace
RUN_IDwith yours, same as the model path. - Give the Flask name anything you prefer. It does not have to be
term-deposit. - The
/predictroute means that a user will be able to access this API when you open that route. For example: In GitHub, I cannot access any repository unless if I am on that route (/repo_name). So you can chage/predictto anything you want or use the base url (/). - After defining the app route, we use the method
POST. This means that a user of that route (endpoint) can post data for the backend to collect. The data in this contest will be what the model shall predict on. The default method isGET. This means a user cannot send us any data. It's useful if we only want to give info to users and not collect from them. - Next is to define a function. We called it
predict. This function is called anytime someone accesses this route. The finction gets the user data, which is in a json format and predicts the class. It returns the prediction as a json too. - Lastly we define the port we want this entire API to run on. In our case it is: http://0.0.0.0/8000
To make a prediction will then be: http://0.0.0.0/8000/predict as in the image below.
Please note that using localhost: or 127.0.0.1: inplace of 0.0.0.0/ would still work.

In [ ]: